In this guide we will install and configure Herdr for agentic development, step by step.
AI-assisted installation
If you’d rather let an agent do the work for you, copy this prompt and paste it into Claude Code (or whichever agent you use). It follows this same guide: it checks each step before running it and asks before touching anything opinionated.
View the full prompt
I want to install and configure Herdr (https://herdr.dev) on this machine for agentic development. Work step by step, check before each step whether it's already done (everything must be safe to re-run), and ask for my confirmation before the optional steps.

1. Install Herdr. On macOS use Homebrew: brew install herdr. If Homebrew isn't available, suggest the official install script from https://herdr.dev and wait for my confirmation.
2. Verify the installation: herdr server status and herdr session list should respond without errors.
3. Install the integration for my agent. For Claude Code: herdr integration install claude. If I use a different one, check https://herdr.dev/docs/integrations/ and ask me which.
4. Create a session named after my main project (ask me for the name) and confirm it survives closing the terminal by reconnecting with herdr session attach <name>.
5. Optional: configure Ghostty as a dedicated Herdr terminal by applying my configuration from https://github.com/SergioDiez/SergioDiez/blob/master/configs/ghostty/config and the Herdr one from https://github.com/SergioDiez/SergioDiez/blob/master/configs/herdr/config.toml. Back up any existing configs first.
6. Optional: if my shell is zsh and EDITOR is nvim or vim, check whether opt+arrow garbles the cursor in the terminal; if so, apply the fix in my .zshrc forcing emacs mode (bindkey -e) with explicit word navigation.

When you're done, show me a summary of what you did, what you skipped, and how to verify it. The full guide is at https://sergiodiez.es/en/blog/instalar-configurar-herdr
Installation
To download Herdr, head to its official website; the easiest way is to use the install script or Homebrew.
In my case I’ll use Homebrew:
brew install herdr
Once installed, run the herdr command in your terminal. This opens a new Herdr session. The first thing I’ll do is rename it to dev, since it’s the one I’ll use for general development; you could use a project name here, for example.
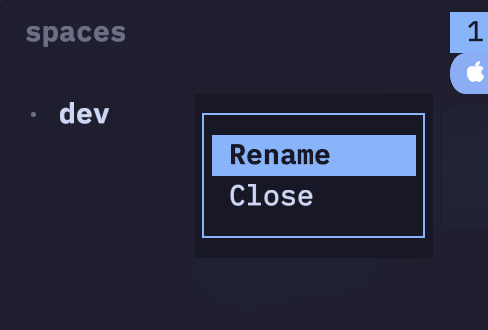
Now, try closing the terminal completely and opening it again. Once open, type herdr and you’ll see the previous session is still running. That’s because Herdr runs on its own server, the Herdr server. If you want to stop that server, run:
herdr server stop
To see the active sessions, use
herdr session list. Withherdr session attach <name>you can connect to a session.
Usage
Prefix
The ctrl+b combination enters prefix mode. This lets you run actions from the keyboard.
Opening a new tab
Press ctrl+b and then c. This creates a new tab at the top. To move quickly between tabs you can press ctrl+b and then the tab’s number (its order); for example, 1 to go back to the previous one.
Opening a new pane
Press ctrl+b and then v to create it on the right, or - to create it at the bottom.
Closing a pane
Press ctrl+b and then x to close the pane.
We’ll leave the shortcuts here for now, as the simplest ones; there will be an advanced guide covering more shortcuts and key combinations.
Using Claude Code
Here we’ll cover using Claude Code with Herdr, though you can configure any other agent, such as Codex, OpenCode… See the list of integrations.
Installation
To use claude, install the integration by running:
herdr integration install claude
Spaces
At the top left you’ll find the spaces section. Here we can configure as many spaces as we want; think of them as different projects. You can also right-click on a space to create a new worktree, which lets us work on simultaneous tasks on the same codebase.
Each space can have multiple tabs, created at the top of the screen.
Agents
On the left side, in the agents block, every running agent is displayed, regardless of the space or tab it’s running in.
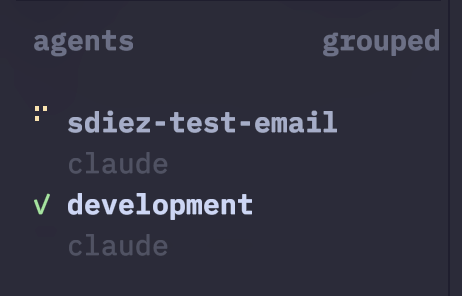
A status is displayed next to each name, so you can tell at a glance whether the agent is working, ready, or blocked waiting for user input. When an agent gets blocked or finishes, Herdr plays a sound to let you know.
In this example, one instance is waiting for user input:
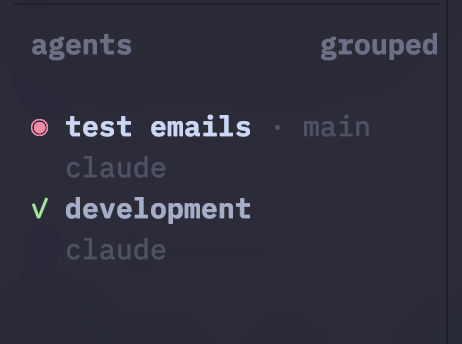
Clicking on any agent takes you to the space and tab where it’s running, which makes it very easy to keep track of them.
Herdr from your phone
One of my favorite things about Herdr is that it doesn’t need a mobile app: since everything lives in the Herdr server, you just connect over SSH from your phone and open the same persistent session, as its documentation explains. The interface adapts to narrow screens, so you can check on your agents, switch spaces, or look at a pane from anywhere.
In my case I make the connection with Tailscale, which creates a WireGuard-based private network between my devices. That way I don’t expose the SSH port to the internet, and it works the same on WiFi or mobile data.
The steps:
- Install Tailscale on your computer and your phone, and sign in with the same account on both; that puts them on the same tailnet.
- Enable SSH access on the computer. On macOS: System Settings → General → Sharing → Remote Login.
- From your phone, with an SSH client, connect using the machine’s tailnet name. In my case I use Termius on Android; if you’re on iPhone, the documentation recommends moshi:
ssh user@my-mac
herdr
And that’s it: the same Herdr session you left on your desktop, now in your pocket.
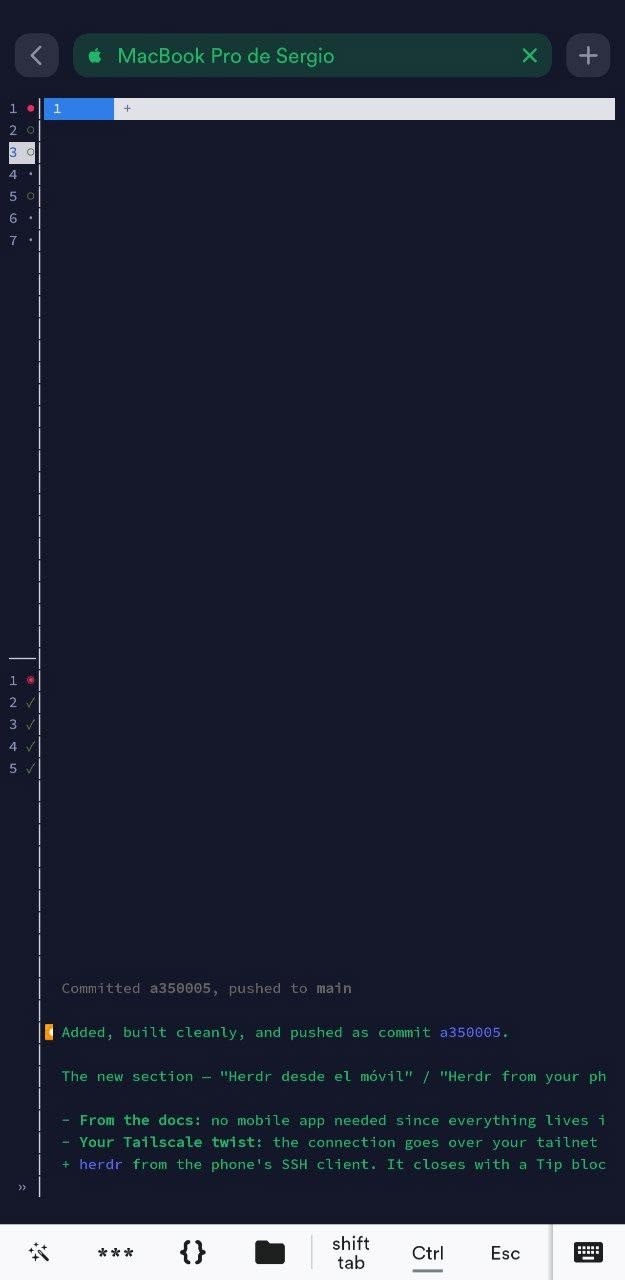
Thanks to MagicDNS, the machine name works from any network regardless of its current IP; there’s nothing else to configure.
If you’re connecting to a laptop, keep it from going to sleep or the SSH session will drop. On macOS it’s enough to leave
caffeinate -srunning in a terminal: the Mac stays awake while plugged in, without touching the energy settings.
My configuration
This section is entirely opinionated: it covers how I configured the terminal and Herdr to my own taste. Take it as inspiration, not as the “right” way to do it.
The terminal
I configured Ghostty to simply be my Herdr terminal. For everything else I use Kitty. This means my Ghostty launches straight into Herdr and has tabs and other built-in features disabled: it’s a single full-screen surface where Herdr lives, since Herdr draws its own interface anyway.
Ghostty configuration
You can find my current Ghostty configuration in my GitHub repository.
The highlights: command points to the herdr binary so it launches when the app opens, the title bar is hidden and the window opens maximized with no padding, and the theme is pinned to dark (TokyoNight). It used to follow the macOS appearance automatically, but when connecting from the phone the SSH client is always dark, and a mid-session theme switch would restyle the running Claude instances; with a fixed theme there are no surprises.
About the font: I use JetBrains Mono, which is free and open source. If you don’t have it installed, on macOS you can get it with brew install --cask font-jetbrains-mono; and if you prefer a different one, just swap the font-family lines in the config for your favorite monospaced font (or remove them to use Ghostty’s default).
Herdr configuration
My Herdr configuration is also in the repository. It pins the same dark theme (tokyo-night), sorts the agent panel by spaces, and defines a couple of plugin shortcuts.
The most useful thing I’ve added lately is a guard for cmd+w: a small script (close-pane-safe.sh, also in the repository) checks whether the pane has a running agent before closing it. If a Claude instance is working or blocked, the first press only shows a warning, and you have to press cmd+w again within 10 seconds to actually close it. That makes it impossible to kill a session by accident.
ZSH config
Only one tweak to my .zshrc was needed to make everything work properly: with EDITOR=nvim, zsh defaults to the vi keymap, and since opt+key sequences start with ESC, every opt+arrow or opt+backspace switched to vi command mode and garbled the cursor. The fix is to force emacs mode and bind word navigation explicitly:
bindkey -e
bindkey '^[^?' backward-kill-word   # opt+backspace
bindkey '^[[1;3D' backward-word     # opt+left
bindkey '^[[1;3C' forward-word      # opt+right
Keybinds
Herdr’s shortcuts work with the ctrl+b prefix, but I wanted to use native macOS shortcuts. The trick is in Ghostty: each keybind sends the corresponding prefix sequence, so to Herdr it looks as if I had pressed ctrl+b followed by the action key.
The most important ones:
cmd+d: new pane on the right.cmd+shift+d: new pane at the bottom.cmd+t: new tab.cmd+w: close the current pane (with the double-press guard when an agent is running, as covered above).cmd+1..9: switch tabs by their order.
And a few extras I also use daily:
cmd+shift+w: close the current tab.cmd+f: opens the pane’s scrollback in$EDITOR, where I can search with/.shift+enter: inserts a line break without submitting, handy when writing long prompts.